
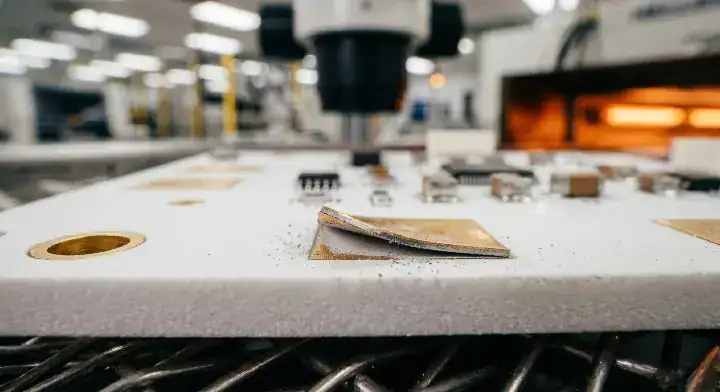
Quick Answer: Copper peeling can involve the metallization interface, the ceramic beneath it or an assembly-related load. Locate the fracture and compare unused boards with assembled samples before assigning a cause. ASTM D3359 tape ratings do not measure peel strength in N/mm, and a reflow peak of 245°C does not by itself prove that a substrate or assembly process is acceptable.
A lifted pad is a symptom, not a diagnosis. Save the failed board, its detached copper where available, and the actual assembly temperature record. The ceramic PCB overview explains the construction families; the investigation below separates their possible failure paths.
Table of Contents
- 1. Why Does Copper Peeling Happen?
- 2. Which DBC Process Issues Deserve Investigation?
- 3. What Is Different About DPC Delamination?
- 4. How Should Adhesion Be Measured?
- 5. Does the Ceramic Material Decide Bond Strength?
- 6. How Can Thermal Cycling Contribute to Peeling?
- 7. Could Contamination Be Involved?
- 8. What Should the Purchase Specification Say?
- 9. What Can a Cross-Section Confirm?
- 10. What Should Happen to Suspect Inventory?
1. Why Does Copper Peeling Happen?
Copper can separate when the load on an interface or adjacent ceramic exceeds its resistance to failure. The contributing factors may include bonding quality, contamination, plating stress, copper geometry, thermal exposure or mechanical handling. More than one factor can be involved.
First Establish What Has Separated
Inspect whether copper detached from the ceramic, a deposited layer separated, ceramic remained attached to the copper, or the failure occurred within the solder joint or surface finish. These observations direct the investigation toward different processes.
Delamination can interrupt current paths, disturb heat transfer or weaken a bonding pad. The effect depends on its location and extent. Do not assign a fixed thermal-performance loss or a failure time without measurements for the particular assembly.
Compare Evidence Before Assigning Responsibility
For a pad that lifts during component replacement, first separate rework loading from a weak incoming bond. An illustrative investigation would retain the detached copper and an unused board from the same lot. Record whether the copper underside carries ceramic fragments, a deposited layer or solder, and preserve the local heating record and the point at which removal force was applied. The last operation performed is evidence to examine, not proof of responsibility.
Use the unused board for an agreed adhesion comparison and examine the failed region with a method able to identify the suspected interface. If the reference bond meets its requirement, investigate whether removal began before the joint was fully molten or whether earlier exposures damaged the assembly. If unused specimens show the same separation mode, widen the review to fabrication and storage. A proposed rework correction should then be checked on representative assemblies for pad integrity and acceptable replacement joints. Passing bare-board adhesion cannot validate removal technique, while an intact replacement joint cannot clear untested inventory. Keep those two decisions separate.
| Observation | Next comparison |
|---|---|
| Damage present before assembly | Storage, handling and fabrication records for that lot |
| Damage first found after reflow | Actual profile, mounting and the condition of unused reference boards |
| Lifted pad after rework | Local heating, component-removal force and accumulated thermal exposures |
| Damage after service | Load history, corrosion evidence and fracture location |
2. Which DBC Process Issues Deserve Investigation?
DBC forms a copper-to-ceramic bond through a copper–oxygen process. Surface preparation and the qualified thermal and atmosphere controls matter. The Rogers DBC technology description provides process background.
Do not prescribe one oxygen concentration, oxide-layer thickness or furnace tolerance for every substrate. A supplier’s validated process window depends on its materials and equipment. A generic internet recipe cannot establish that a particular batch was processed correctly.
Connect the Process Record to the Failed Part
Ask the supplier to check the lot against its approved process limits and inspection records. Relevant evidence may include the ceramic and copper identities, preparation steps, furnace run, process deviations and interface examinations. Proprietary recipe details are not always needed to show whether a controlled process was followed.
Compare suspected and unaffected regions. An isolated edge failure and widespread separation across a panel do not necessarily have the same cause. Treat furnace deviations as hypotheses until the fracture analysis and lot evidence support the connection.
3. What Is Different About DPC Delamination?
DPC uses a deposited metallization system followed by copper build-up and patterning. Adhesion between the ceramic and deposited layers, continuity of those layers and stresses in the plated metal can therefore matter. Do not assume that every DPC supplier uses the same seed metals or thicknesses.
Kyocera’s thin-film circuit-board overview describes deposited metallization in ceramic packaging. The precise stack and plating route for a proposed DPC board still need its supplier’s documentation.
Inspect the Actual Layer Stack
Determine which layer stayed on the ceramic and which lifted with the copper. A surface that looks bare under an optical microscope may still contain a thin deposited layer. Choose microscopy or compositional analysis with enough resolution for the suspected interface.
Review plating stress, preparation and deposition conditions against the qualified process. There is no universal current-density threshold that proves all copper above it will peel. Trace width, thickness and local geometry should be included in the comparison rather than declaring DPC suitable only below one line-spacing threshold.
For a mixed fabrication and assembly problem, provide both sets of records when discussing a ceramic PCB investigation. Looking at only the substrate certificate or only the oven recipe can miss the interaction.
4. How Should Adhesion Be Measured?
Use a method suited to the metallization, specimen and failure question. Peel, pull-off and tape tests do not report interchangeable properties.
Peel Force and Pull-Off Stress Use Different Units
A peel test reports force relative to strip width, commonly N/mm. A pull-off test may report force or nominal stress calculated from force divided by a defined bonded area. Reporting N/mm² from a pull-off test does not make the result comparable with an N/mm peel requirement.
Record specimen geometry, copper thickness, peel angle or loading direction, speed, conditioning and failure mode. If a soldered attachment breaks first, the result may characterize that attachment rather than the underlying copper bond.
For a unit-conversion example only, assume a peel specimen has a measured width of 5 mm and the force value selected by the agreed method is 30 N. Force divided by width is 30 / 5 = 6 N/mm. The same value can be written as 60 N/cm or 6 kN/m. These are equivalent units, not three different adhesion results. The inputs are hypothetical and are not a pass criterion or a QueenEMS measurement.
Now assume a separate pull-off test records 60 N over a defined bonded area of 10 mm². Its nominal stress is 60 / 10 = 6 N/mm², or 6 MPa. The repeated numeral six does not make this result equivalent to the peel value. One quantity is force per width; the other is force per area. There is no unit conversion from either quantity to an ASTM tape rating.
Before comparing two reports, verify whether each force is a peak, an average over a specified interval or another statistic required by the method. Retain the force trace and identify the interval used. A result copied without that definition may hide different data-reduction methods even when the displayed units match. Also check whether the stated strip width is the measured test width or merely a nominal drawing dimension.
What Can a Tape Test Establish?
ASTM D3359 evaluates coating adhesion using tape and ratings. The standard explains that it does not provide an absolute bond-strength value and is limited in distinguishing higher adhesion levels. Its applicability to the particular coating and substrate must be considered.
Do not cut a generic grid into a production power substrate and interpret a rating as a quantitative copper-ceramic acceptance test. Establish the agreed specimen, method and damage allowance before testing.
| Test or observation | Useful result | Main limitation |
|---|---|---|
| Defined peel test | Force per strip width and fracture path | Depends on geometry, copper build and conditions |
| Defined pull-off test | Force or nominal stress with failure mode | Attachment or ceramic may fail before the target interface |
| Applicable tape test | Qualitative coating-adhesion rating | No conversion to N/mm peel strength |
| Cross-section | Local layer structure and defects | A section samples a limited plane |
5. Does the Ceramic Material Decide Bond Strength?
Material properties influence the failure path, but a chemical name does not define a universal copper adhesion value. Compare the ceramic grade, bonding route, copper thickness and specimen conditions together.
Si₃N₄ AMB is a commercial option for demanding power modules, as shown in NGK’s product description. That does not mean every Si₃N₄ substrate will outlast every alumina or AlN substrate, or that a material change guarantees an intact interface.
A peel specimen that fractures inside the ceramic provides different information from one that separates at the bond. Discuss those results with the substrate supplier before ranking materials by one measured force. For IGBT module substrates, also consider the die-attach and baseplate interfaces rather than comparing the bare substrate in isolation.
6. How Can Thermal Cycling Contribute to Peeling?
Copper and ceramic expand by different amounts as temperature changes. The resulting stresses depend on temperature range, copper pattern and thickness, ceramic properties and constraints. Thermal cycling can contribute to damage, but it does not imply a fixed adhesion loss after a specified number of cycles.
Inspect Edges and Constrained Regions
Record whether damage begins near copper corners, cutouts, attachment points or another repeated feature. Compare the actual geometry with the drawing and the supplier’s stress-relief rules. Copper segmentation, edge shaping or a revised stack may help in a particular design, but these changes also affect current flow and insulation.
Equal copper thickness on the front and back does not “neutralize” all thermal stress. Different patterns and attachment conditions can still produce bending or local loads. The CTE-mismatch discussion explains why the surrounding joint structure also matters.
To evaluate a correction, test the changed construction under the agreed cycle conditions and inspect the original failure region. Avoid universal limits such as a maximum 100 mm² solid copper area on AlN unless the actual design rules require them.
7. Could Contamination Be Involved?
Residues can interfere with preparation or metallization, but neither an arbitrary film thickness nor a fixed percentage adhesion loss identifies the cause of a failed board. Look for evidence on the relevant surfaces and in the process history.
Preserve the Surface Before Cleaning It
Photograph and retain the as-received or failed condition before applying solvents or abrasive cleaning. Analysis of a cleaned sample may no longer reveal the contamination that was present during failure. Ask the laboratory how to package samples for the intended examination.
The cleaning sequence must suit the ceramic, copper, deposited layers and chemicals used. Alkaline cleaning, etching, plasma treatment and rinsing are process options, not a universally mandatory sequence. A treatment that helps one surface may damage another layer or alter dimensions.
For sputtered films, review the validated chamber and preparation controls. Do not prescribe a vacuum level or gas composition without knowing the deposition process. If the symptom is a ceramic crack rather than interfacial separation, use the separate assembly-cracking analysis to avoid treating every defect as contamination.
8. What Should the Purchase Specification Say?
State an agreed adhesion requirement for the offered construction, including the test method and conditions. An undefined “IPC Class 3” statement is not a substitute for a ceramic copper-bond specification.
Include Enough Detail to Repeat the Test
Define the coupon or specimen drawing, loading geometry, speed, conditioning, sampling and acceptance criterion. Require the failure mode with the result. Specify how the tested sample is linked to the supplied material and production lot.
The Rogers curamik data sheet illustrates that even published peel values carry copper-thickness and test-speed conditions. Use the applicable supplier specification rather than borrowing a number for a different construction.
A suitable purchase note can require “adhesion testing to the agreed specimen drawing and test procedure, with measured results, conditioning and fracture mode recorded.” The actual limits and sampling belong in the referenced specification. Review the quality-report format so the expected information is clear before delivery.
9. What Can a Cross-Section Confirm?
A cross-section can reveal local separation, cracks, layer thickness or other structural features. It does not identify every defect across the board, and a dark line is not automatically a void. Preparation damage, orientation and imaging contrast must be considered.
Match the Image to the Failure Location
Keep the specimen identifier, cut location, orientation and scale with the image. Compare the failed region with an unaffected region and, where useful, with an unassembled reference from the lot. Additional imaging or compositional analysis may be needed to identify a very thin interface.
Do not require every DBC section to show one assumed oxide chemistry or every DPC section to contain a particular seed-layer thickness. Check the actual construction. Likewise, solder intermetallic growth and copper-to-ceramic separation are different observations; a solder-joint image alone may not explain a lifted pad.
Acceptance criteria must come from the agreed specification and its sampling basis. Neither “zero risk” for a clean image nor a universal 5% voiding rejection rule can be justified without that context.
10. What Should Happen to Suspect Inventory?
Isolate suspect lots and preserve the evidence before further assembly or rework. Identify affected serial or lot codes, the process stage where damage appeared and the disposition of unused boards.
Treat Repair as a Construction Change
Replating a locally stripped DBC region is not a routine way to restore the original bonded structure. Any proposed repair needs an engineered process, a defined acceptance plan and customer approval where required. A slower reflow profile cannot restore an interface that has already separated.
Select replacement, additional evaluation or a qualified repair based on the defect and product requirements. Avoid unsupported salvage percentages or claims that a tape test on a few samples clears every board. Destructive testing must be planned so the sampled parts are not returned to production as if undamaged.
Close the investigation with a record of what changed and what evidence checked it. If the proposed correction changes copper geometry, compare the identified failure region on the revised construction. If it changes cleaning, preserve evidence showing which preparation steps differed. Changing the geometry, material source and assembly profile together may produce an acceptable new assembly, but it makes assigning the improvement to one corrective action difficult.
State the result at its demonstrated scope. An interface that remains intact in the evaluated samples supports that specific comparison; it does not prove every stored board is unaffected. Keep the disposition of existing stock separate from approval of the revised process. This prevents a successful engineering trial from silently releasing lots that never received the correction.
FAQ
Does a high DBC bonding temperature prove that 245°C reflow is safe? No. Compare the measured assembly profile and loads with the qualified construction. A bond can be damaged by stress without remelting the original bonding interface.
Will ENIG prevent copper from peeling off the ceramic? ENIG is a surface finish over copper. It does not establish that the underlying copper-to-ceramic bond is sound. Inspect the fracture location before changing the finish.
Can the number of reflow passes explain a lifted pad? It may be relevant, but there is no universal pass count that proves the cause. Review actual temperatures, exposure times, handling and the failed interfaces together.
Send QueenEMS photographs, the substrate stack, lot identifiers, assembly profiles and the stage where peeling first appeared. A ceramic substrate enquiry can then address the investigation scope or replacement construction without assuming who caused the failure.
Written by the QueenEMS Engineering Team
Upload your files today · Free DFM check before production · Ship worldwide
Get your PCB prototypes in as fast as 24 hours. We handle FR4, Rogers, and Flex up to 60 layers — free prototypes for 2–4 layer boards, no minimum order.
Just upload your Gerber + BOM — we source every part, assemble, and inspect (AOI + X‑Ray) so you don't have to chase suppliers. Boards ship in as fast as 24 hours.